Showing posts sorted by relevance for query butter. Sort by date Show all posts

Homemade Butter

Homemade butter

I think it's time to finally say hi and break my radio silence. Also, I would like to wish you all a very late happy New Year. I hope your new year has started out fantastic!

I can't believe January is almost over!

I've been struggling with lack of inspiration and motivation, and that's the reason why I haven't been updating my blog lately. I have to say, though, that I've been missing you and my little blog.
Luckily, my very dear friend Giulia came to London on a working holiday. I always enjoy the time we spend together working on new ideas, brainstorming, cooking and laughing. Isn't that exactly all you need when you are looking for inspiration everywhere, but can't seem to find any?
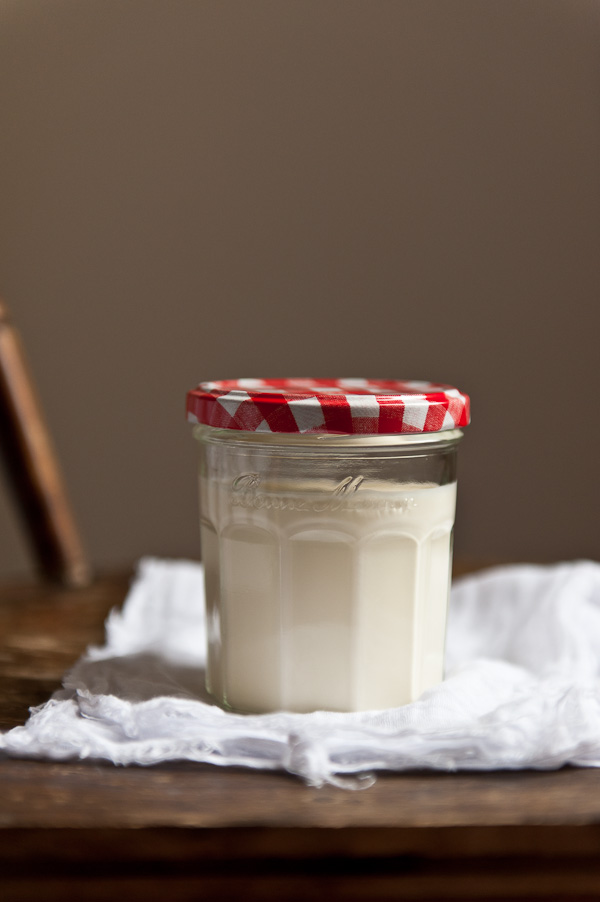
double cream for homemade butter


New motivation didn't come easy to me though. I must admit that Juls and P. basically blackmailed me into working on a new projects and posts. I want to thank them for that!

Back to basics! 

Complicated projects are not ideal for times when you get stuck. Just get back to basics. Start adding more, little by little. I'm not an expert on "getting stuck situations", but this worked for me. 

I decided to get back to basics. I've been planning on making homemade butter for sooooo long.
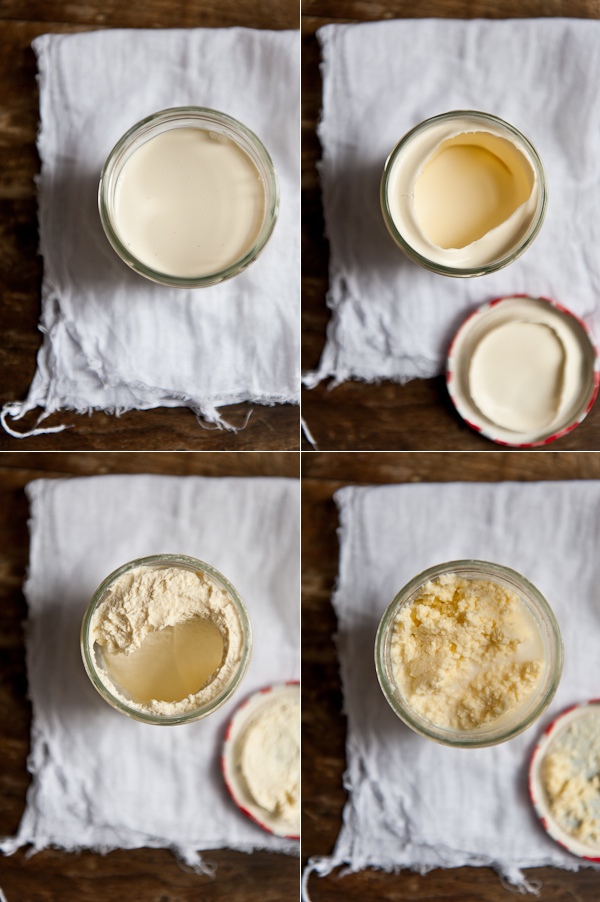

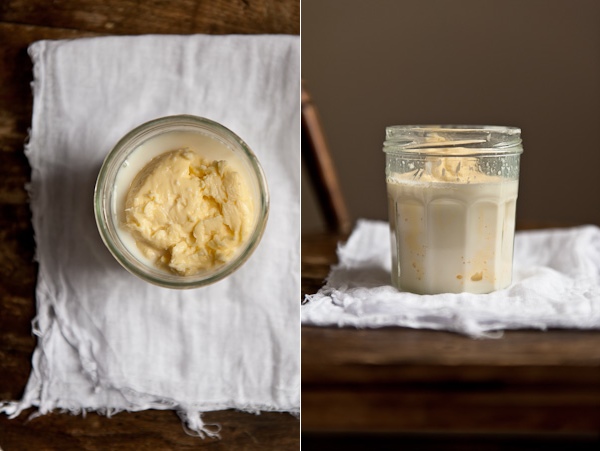
Butter_Phases
Butter Last Phase
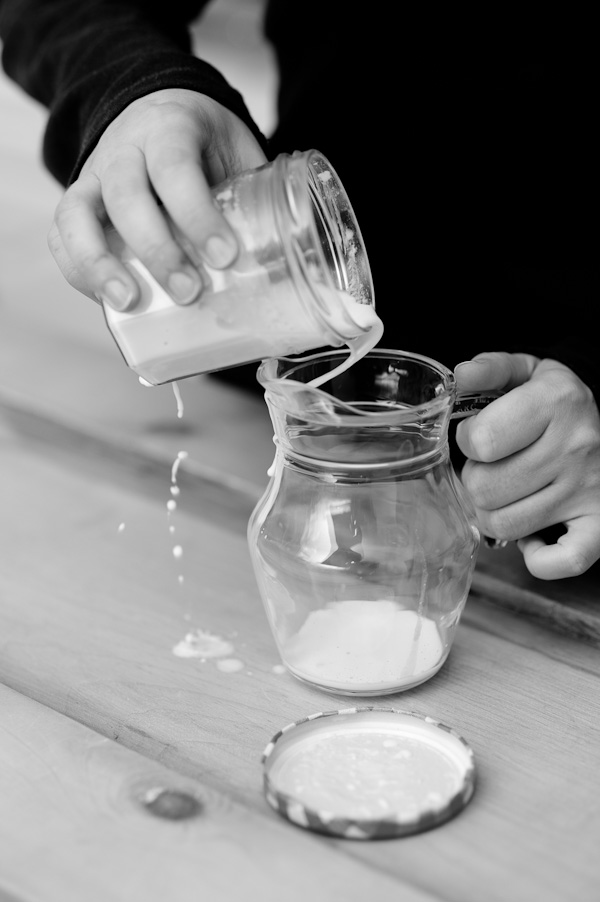
Straining buttermilk from butter


What ingredients do you always have in your fridge? I usually have eggs, cheese, fresh vegetables and butter in my fridge. As Julia Child said, "Butter makes everything taste better". 

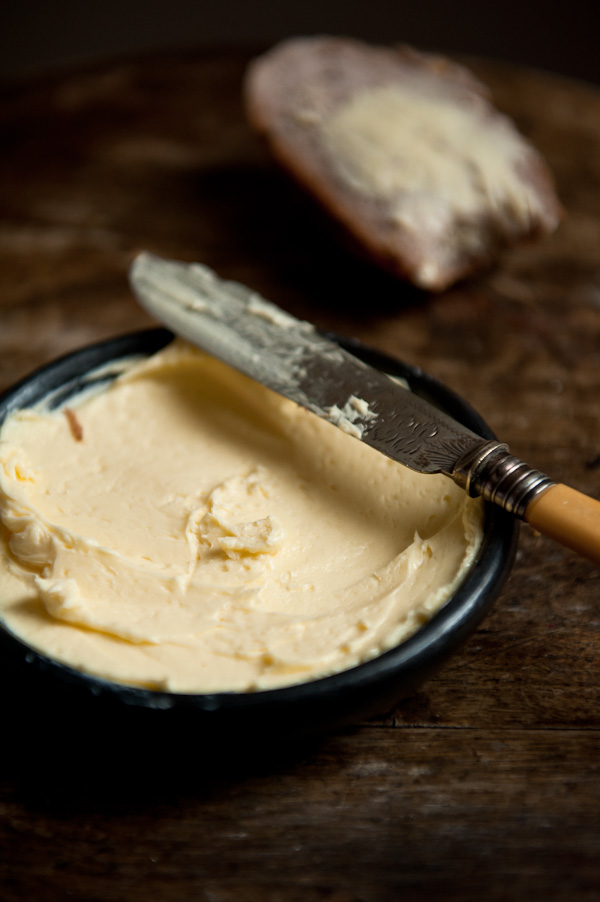
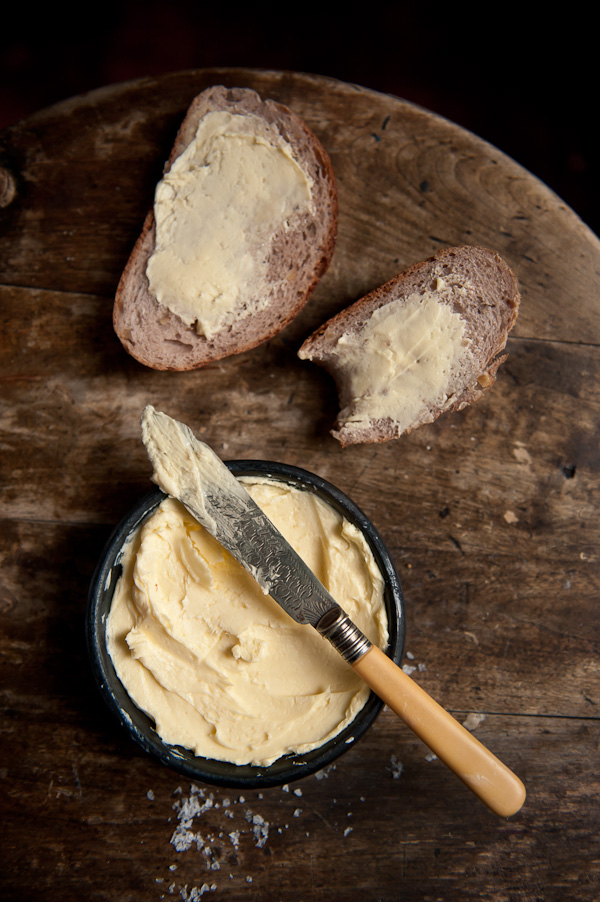
Homemade butter is, however, completely different experience. It's so creamy and silky with a hint of Maldon sea salt. Add freshly baked bread and I'm sold! If that's not enough for you, head over to Juls' blog to add just one more ingredient to create an easy sandwich bursting with flavours. 
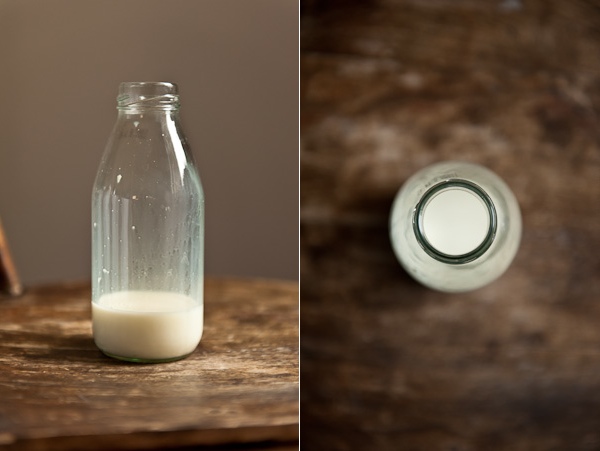

Buttermilk
Homemade butter with bread

You can very easily prepare butter using your food processor or blender.  Using a shaking technique is much more fun and it's a perfect arms workout. I felt like I spent an hour in the gym the next day after making the butter. Somebody could say it's a bit too much of a hassle for butter,  but believe me, it is well worth it.

Homemade butter


Butter
yields about 90g butter

250ml double cream
Maldon sea salt to taste

Pour the double cream into a jar. The jar should be at least one third larger than the amount of double cream. Put a lid on, and start shaking the jar. After 2-3 minutes, the cream should be quite thick and nicely whipped. Continue shaking, until the cream starts to pull away from the sides of the glass. At this point it's quite hard to shake the jar, so it's easier and more effective to tap the jar firmly on a table covered with a thick layer of tea towels. Be careful not to brake the jar. Continue to tap the jar, turning it upside down and back as you go, until the buttermilk starts separating from the butter.  Pour the buttermilk into another container (you can use the buttermilk later) and shake the jar a few more times to separate as much of buttermilk as possible.
Pour cold water into the jar to wash the butter. Pour off the water. Use a spoon or spatula to squeeze out as much buttermilk out of the butter as possible. Wash again until the water is clear. When the butter is clean, mix in salt to taste and refrigerate.
You can also add herbs or garlic if you like.


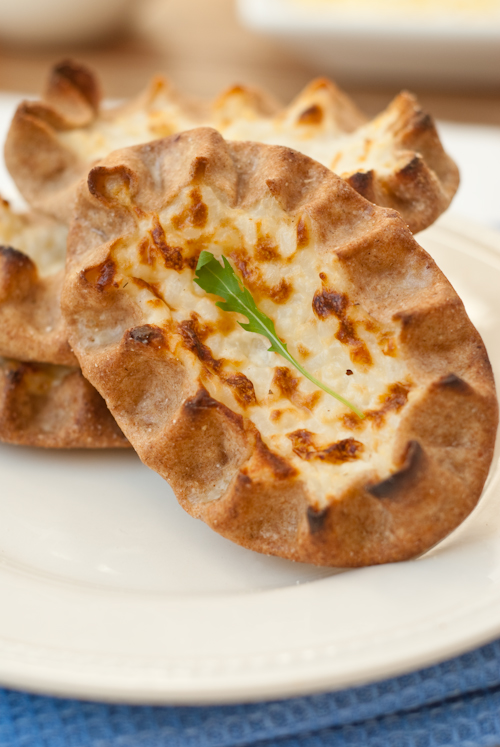
Karelian Pies, winter holiday and Finnish cuisine and traditions


First of all I want to apologise for the long silence. I know it's been almost one month since I posted the last recipe. I am not sure if I have a good excuse for not updating the blog. However I'm back in full power now, and I have a special recipe for you today!

As you may know, I was on a holiday in Finland last week, and the recipe I'd like to share with you today is, surprisingly, related to Finland. Actually, the holiday itself, was highly related to Finnish cuisine. This way I want to express my huge thanks to our friends, who decided to brake with food tradition, in order to introduce some of the typical Finnish dishes to us.


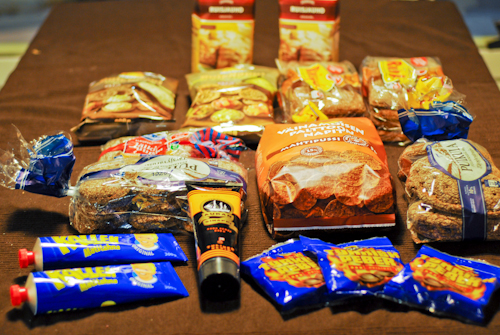
P. and I are both big fans of scandinavian cuisine and of some of the Finnish goodies in particular. We return with a luggage full of all kinds of food and drinks every time we travel to Finland. Oh, how much a love a traditional rye bread. Actually, if I think about it, we return with a luggage full of local products every time we go on holiday, no matter where we travel. That's what I love about travelling. Isn't it just great to taste local goodies, bring some of your memories back home with you, and extend your holiday at least in a culinary way?
I can honestly say that I don't usually buy typical tourist souvenirs. I'm more than happy if I can visit a local market, and use all my luggage allowance to bring as much as I can! :) Call me crazy, but this is just the way I do it, and I love it! Besides, I really hate dusting, so I can't even think about any souvenirs that are merely dust catchers.


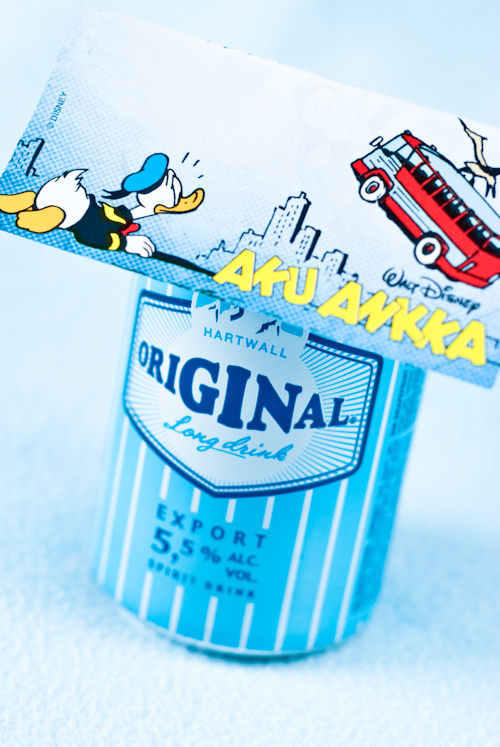
Our favourite treat we bring from Finland every time we travel there is Gin Long Drink. This very refreshing drink is a mixture of grapefruit lemonade and gin. Gin Long Drink, commonly called "lonkero" (=tentacle) was first introduce in 1952 when Finland was preparing for the Summer Olympics. Since then lonkero has become very popular. Gin Long Drink is produced by several companies. We tasted some of them, but the original drink from Hartwall remains our all time favourite for its specific taste, and it's also the best selling product in Alko stores. This fact is more than understandable when you imagine that Finns often enjoy their ice cold GLD before, during and after their sauna! Yes, we did it too! :)


When speaking about traditions, I must not forget to mention Aku Ankka (Donald Duck), the trouserless duck in a sailor shirt and cap . This cartoon magazine has been published in Finland since 1951 and it has become one of the most read publications ever since. Aku Ankka is more popular in Finland than in the United States, the country of its origin, which is an interesting phenomenon. Subscription to Aku Ankka is almost a national tradition. It is widely read not only by children, but also by grown-ups.


One of the main reason for Aku Ankka's popularity is its high quality of the educational and language aspect. The quality of its Finnish language is, without question, remarkably good. Thanks to the good and colourful language and the grammatical quality, the Aku Ankka can naturally only be understood by native speakers. We asked our friend to translate some words in a magazine, which we'd randomly picked only for its visual interestingness, and the answer was alway the same. It was quite difficult and tricky to translate. Many children learn to read thanks to the help of Aku Ankka. According to Sanoma Magazines (the comics' publisher) Aku Ankka now has about 1 million readers. Compare it to a population of 5.4 million and you get a huge success!


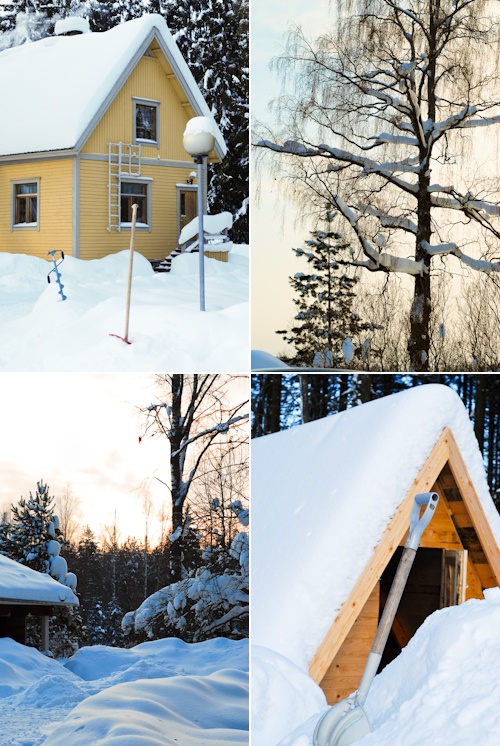
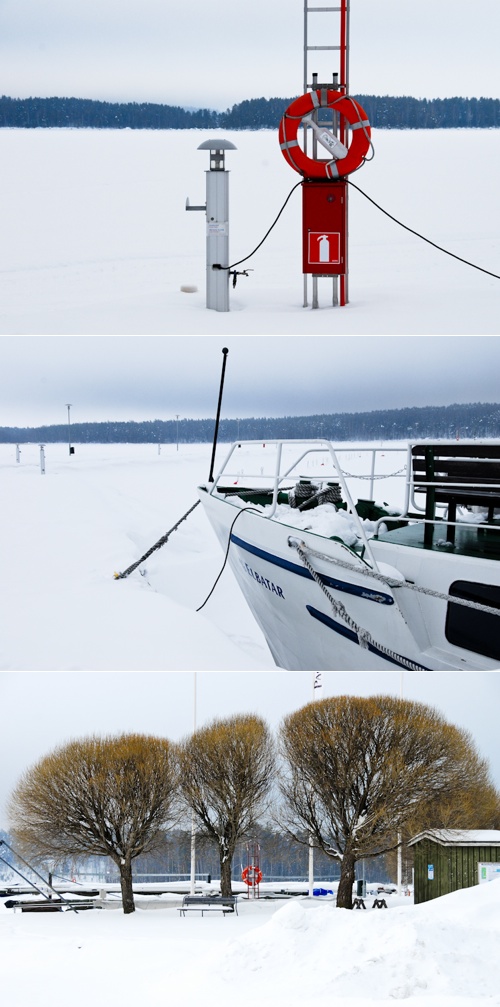
But let's get back to our holiday. We spent only 6 days in Finland but we had a blast. We were more than happy with the pleasing sunny weather and the average temperatures of -8C. This winter there is an exceptional amount of snow in Finland. That was like a dream for me, as I've never been to Finland during the winter, and I so much wished to experience a proper Finnish winter. My dream came true! There couldn't be a better way to enjoy this wonderful weather than going to a Finnish summer cottage with no running water. Only a well, a sauna and a dry toilet where available! We survived, and we would have stayed even longer if we could. Can you imagine what a modern technology detox it was? No computers, no internet... It was truly relaxing holiday.


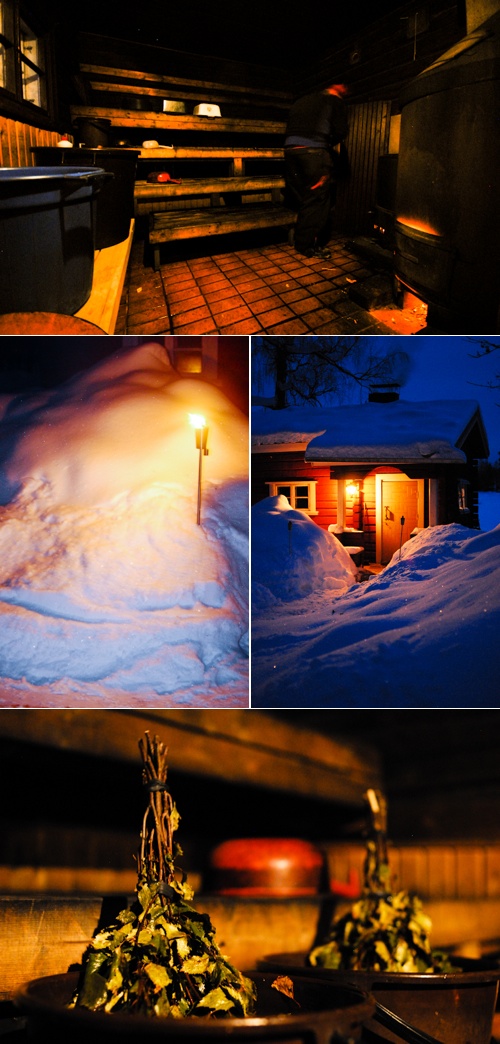
It wouldn't be a proper holiday in Finland without a sauna. Saunas are an important part of Finnish culture. Did you know that in the old days, women usually gave birth in saunas? A sauna whisk called "vihta" is often used in traditional saunas. The whisk is made of a bunch of fresh birch twigs and is used for massage and stimulation of the skin. Dried vihta is revived by soaking in warm water, so you can enjoy it any time of the year. The Vihta also gives off a wonderful smell of birch inside the sauna. I love sauna and miss it so much in London.


I was talking about food traditions at the beginning of this post. Finnish cuisine is quite underestimated and not very well known. There is a strong emphasis on fresh local seasonal ingredients. This aspect of the cuisine won my admiration. Its importance is evident especially nowadays, when sustainable food and agriculture are widely discussed and promoted, and people around the world are inspired to eat local food and use local products.

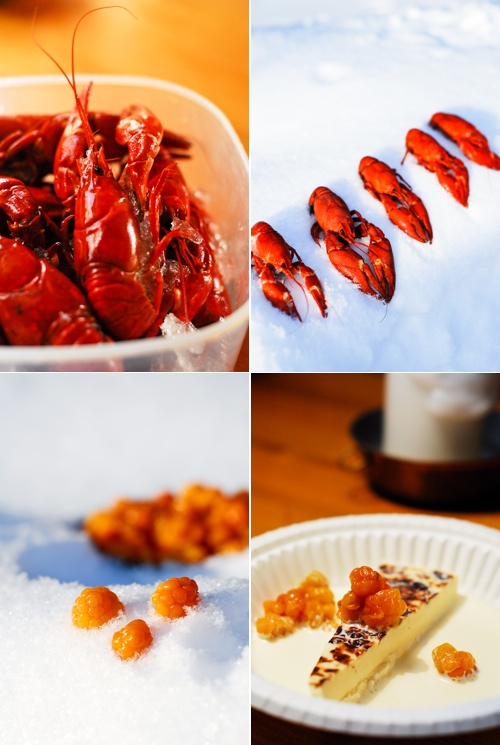
I can say from my own experience that Finnish people really eat particular food only when it is in season. At least, our friends do. So don't try to eat pickled herrings with mustard in February if you don't won't to look like you've just are arrived from the Mars. And, especially don't eat the whole jar just with bread. Pickled herrings are typically only eaten at Christmas or at midsummer when new potatoes are in season. So you can imagine how weird a picture of crayfish on the snow looks like to Finns. Still don't know why?


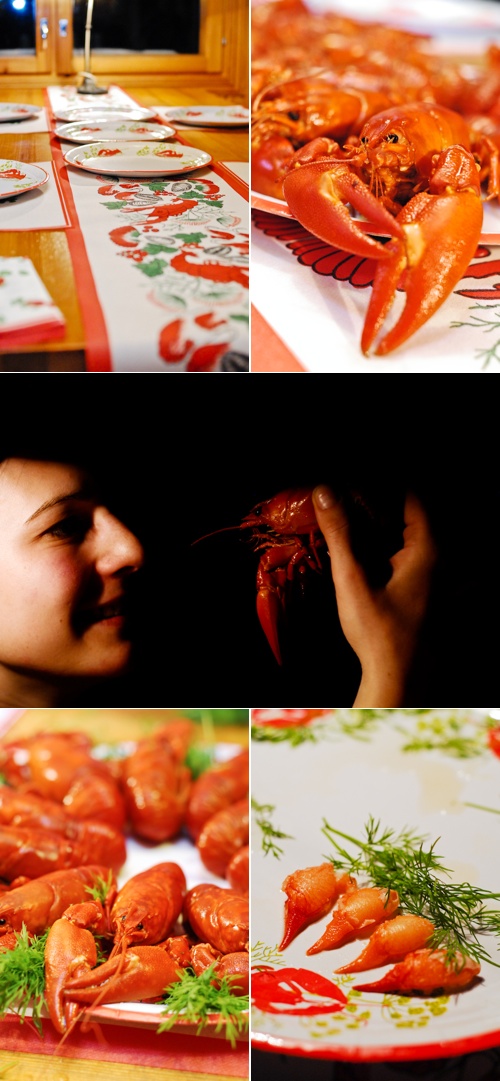
Here's the story. Ask any Finn person when they usually eat crayfish. I bet you get an answer saying that crayfish are only eaten throughout August and September. It is time for the traditional crayfish party. The reason is quite simple. Crayfish harvest starts officially in the middle of July and finishes at the end of October. During this time, shops are full of table decorations like napkins, tablecloths and paper plates with crayfish pattern. Crayfish are cooked with dill and eaten with toasts. This is also the only occasion when eating loudly is tolerated as sucking is necessary to enjoy the juices inside the crayfish. A special crayfish knife is needed to open the crayfish. Short crayfish songs are usually sung and vodka or other alcohol are drunk.

We ate crayfish in February, and so did our friends, for the first time in their life! And they were absolutely divine! Most of Finns would probably think you are mad if you told them about this. It's all about traditions. Our friend's father caught and froze crayfish for us so we could enjoy these delicacies during very unusual time of the year.


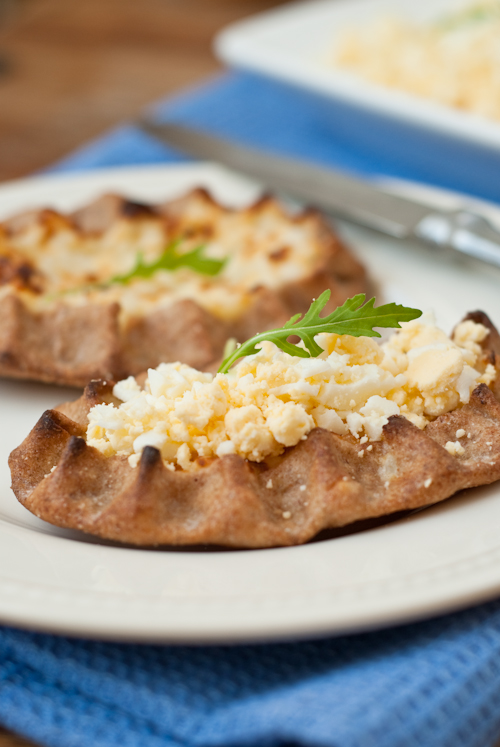
And here comes the promised recipe. Karelian pies are traditional pasties from the Karelia region, the eastern parts of Finland. The thin rye crust is traditionally filled with rice porridge or mashed potatoes. Various fillings like carrot are also used nowadays. I fell in love with karelian pie the first time I'd tasted it. It's often eaten with egg-butter (munavoi) which is spread over the hot pie before eating.

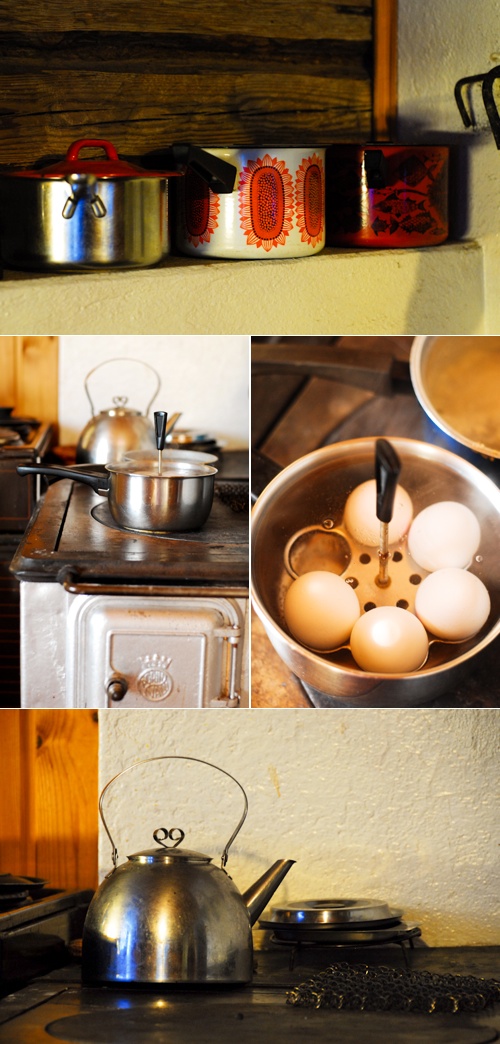
This egg-butter is supposed to be eaten ONLY with karelian pies. So imagine our friends surprise and consternation when P. started to eat it on its own and then spread it on his toast! :) And imagine our surprise when one morning our finnish friend spread the egg-butter on his bread too, and a little one ate a spoonful with his porridge. 


I was warned that making karelian pies take time to master, but I think I did quite well for the first time! I know, I still have to improve in an area of their look, but at least they tasted great.


Karelian Pies (Karjalanpiirakat)
Make about 20 pies


Ingredients

Rice filling:
4 dl (340g) short-grain (pudding) rice
2 l milk
500 ml water
1 tsp salt
2 tbsp butter

Dough:
4 dl (250g) rye flour
1 dl (55g) plain flour
1 tsp salt
200 ml water

Butter, for glazing

Egg-butter spread:
8 hard-boiled eggs
150 g salted butter

1. Bring water to a boil in a heavy-bottomed saucepan. Add the rice and cook over low heat until all the water is absorbed. Add the milk and bring again to a boil, stirring frequently. Reduce the heat to a very low and simmer for 30-40min, stirring occasionally, until the rice is cooked. Take the rice off the heat, stir in the butter and season the porridge with salt. Set aside to cool.

2. In a medium bowl, combine flours and salt and stir into cold water. Knead the dough until all ingredients come together and the dough is solid and even. Form the dough into a bar and divide it into 20 pieces. Roll the pieces into balls and flatten them with your hand. Sprinkle each piece with rye flour to prevent them sticking together and cover with a kitchen towel.

3. On a floured surface, roll the flattened pieces into thin and oval crusts. Try to roll them as thin as possible. Line the crusts up so they overlap and sprinkle some rye flour between them so they don't stick together. Cover the crusts with a kitchen towel to prevent them from becoming dry.

4. Fill each crust with the rice porridge. Place about a tablespoon or more of the rice filling on the crust and spread evenly to fit the shape of the pie. Fold the crust edges over the filling and pinch tightly with your fingers.

5. Places the pies on a baking tray lined with baking paper. Bake in preheated oven to 275-300C for 10-15 minutes, until golden brown.

6. Brush the baked pies with melted butter and cover them with baking sheet and kitchen towel to soften.

7. To make the egg-butter, mash the eggs and softened butter with a fork together, in a bowl, and place into the fridge to cool.

Sunday Menu in a New Kitchen - Beef Balls and Apple Crumble


It is said that all beginnings are difficult. Well, I don't start with cooking and baking, but I start to do it in a new kitchen of our newly rented apartment. And that's the issue here! We've bought just basic utensils such as knives, cutlery and similar stuff, and I can only dream about any advanced kitchen accessories. This creates situations like "How can I measure 200g of butter?". Yes I know, there are usually marks on the edge of a butter wrapper showing 50g, but what if the original cube of the butter is no longer a cube or any other regular geometric pattern? These situations then result in something like "Ok, lets guess, it could be like this much..." :o)

In spite of similar troubles, I decided to make a Sunday menu and I planned:
  • Apple Crumble
I wanted to make an apple dessert because I bought many beautifully looking apples last week, but then realized they were very floury. And what else to do with them. I was searching on internet and in my cookbooks for a while, looking for a recipe where fruit dominates, because that's the only type of dessert my boyfriend likes. And now I have to say a crumble is the answer! It was a great success, my boyfriend loved it and so did I. Another great thing about crumble is that it's soooo easy and quick!


  • Beef Balls
I found this recipe only because I wanted to try something new from one of many cookbooks we have, and the beef balls looked very conveniently as I had minced beef in a freezer. Again, it was a fabulous choice even if I didn't use all ingredients listed in the recipe!


Apple Crumble
Serves 8

Crumble:
200g plain flour
200g demerara sugar
200g unsulted butter (cubed at room temperature)
100g porridge oats
1 handful raisins
butter for greasing

Fruit base:
8 eating apples, peeled and cubed
1 tbsp plain flour
2 tbsp demerara sugar
2 tbsp rum

1 Place the cubed apples in a pan, sprinkle with the sugar, pour in the rum and simmer gently for 5-10 minutes until slightly softened but still quite firm. Set aside and allow to cool a bit.

2 Preheat the oven to 180C/ 350F/ Gas 4.
3 Mix the flour, porridge oats and sugar in a bowl. Add the butter and rub between your fingers until it is the texture of breadcrumbs.
4 Place the apples in a large greased ovenproof dish and mix with the flour, sprinkle with the sugar and the raisins. (You can mix the raisins with the crumble mixture if you like instead of sprinkling them on top of the fruit.)
4 Top the fruit with the crumble mixture.
5 Bake for 30 - 40 minutes until the crumle mixture is starting to brown and the fruit mixture is bubbling.
I used muesli we usually have for breakfast instead of porridge oats (because I didn't have any) and I added more flour to the mixture to make it less sticky. The result was outstanding!


Beef Balls with pickled garlic
Serves 4

Meatballs:
450g (1lb) minced (ground) beef
3 garlic cloves, crushed
1 tsp white pepper
1 small handful leaves coriander, chopped
1 small handful Thai basil, chopped
1 spring onion (scallion), finely chopped
3 teaspoons fish sauce
1 egg

Sauce:
3 tbsp oil
3 tbsp green curry paste
3 tbsp finely chopped ginger
11/2 tsp ground turmeric
3 tbsp fish sauce
3 kaffir lime (makrut) leaves
21/2 tbsp tamarind purée
3 tbsp chopped pickled garlic
11/2 tbsp shaved palm sugar (jaggery)

1 To make the meatballs, combine all the ingredients together well. Then taking a tablespoon at a time, roll the mixture into small balls. You should have about 24 balls.

2 Heat the oil in a heavy-based saucepan over medium heat and add the curry paste, ginger and turmeric and cook, stirring frequently for about 5 minutes, or unit fragrant.

3 Add the fish sauce, kaffir lime leaves and tamarind. Bring to the boil then cover, reduce to a simmer and cook for 5 minutes. Add the meatballs, pickled garlic and palm sugar and simmer for 15 minutes, or until meatballs are cooked through.


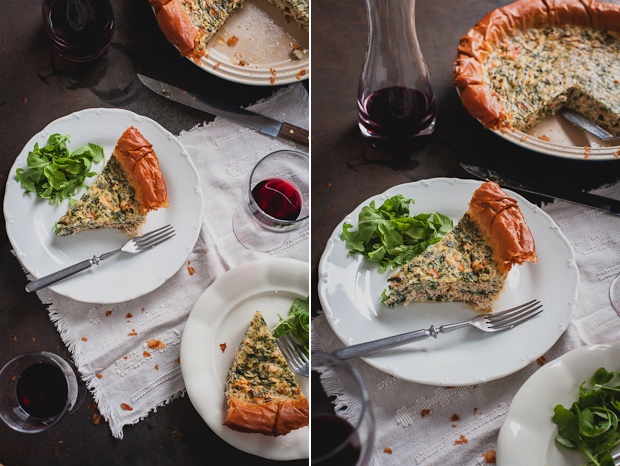
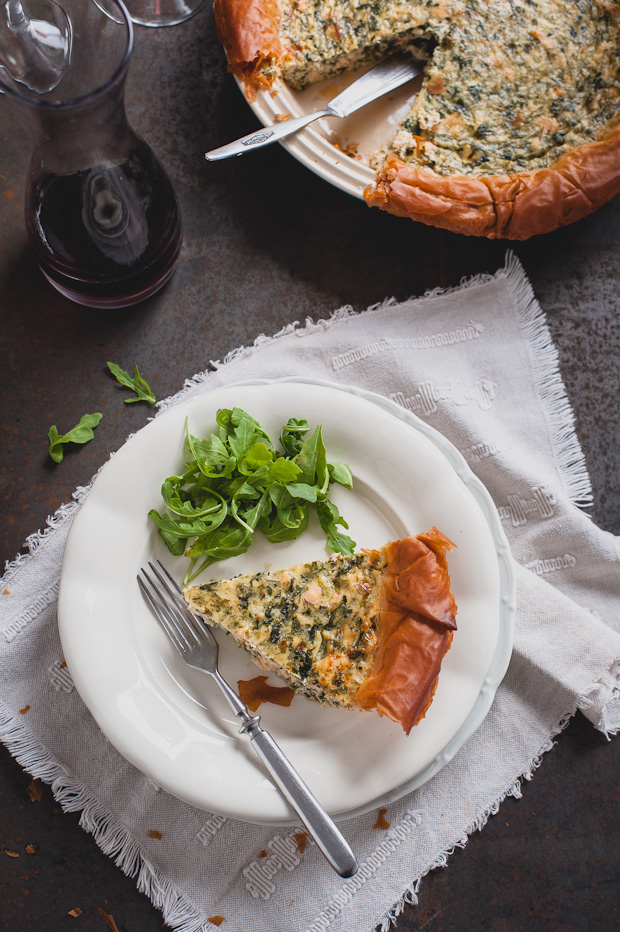
Salmon, Spinach and Quark Quiche with Phyllo Crust

Salmon and quark quiche

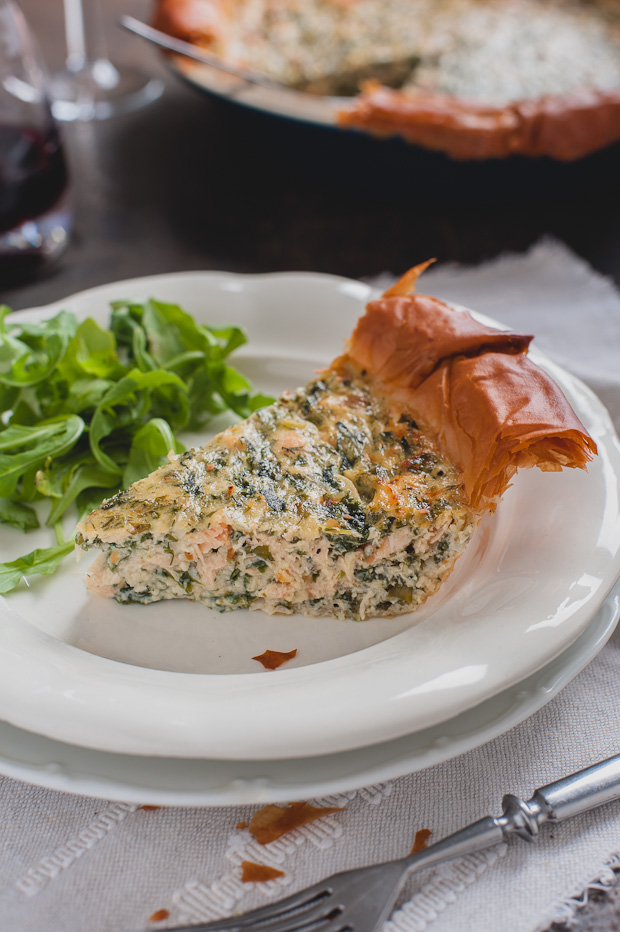
I made this quiche a few weeks ago and it was a big hit in this house. It's so easy and taste great hot or at room temperature. I made the quiche for dinner and we enjoyed leftovers the next day for lunch. Served with fresh greens and a glass of wine, it's the perfect picnic or garden party food.

I decided to use phyllo pastry instead of a traditional pie crust. Was it my laziness or curiosity? I can't quite remember. However, P. welcomed the experiment with great pleasure as he's not a big fan of pie crust. The purpose of phyllo pastry in this recipe is to hold the filling, rather than to be a part of the dish. Although I really liked the crisp edges. Using quark was another experiment which worked great. I love quark desserts, but I don't remember ever using quark to make a savoury dish.

I used a lot of fresh herbs because I just love the flavour combination of salmon and dill. You can reduce the amount of dill or completely omit it if you don't like its taste. Also you can substitute spinach for kale or swiss chard.

Update: If you can't find quark you can be substitute it for ricotta. Quark is a European type of fresh cheese made from soured milk. It has a very soft and smooth texture with a lovely tangy taste. In the UK, quark can be found in almost any Polish shop/deli or in the international section of major supermarkets.

Salmon quiche
Salmon and quark quiche


Salmon, spinach and quark quiche with phyllo crust
Serves 6-8

225g fresh spinach
1tbsp butter
2 garlic cloves, chopped
1 bunch spring onions, sliced
3 eggs
300ml single cream
250g quark cheese
1/2 cup grated parmesan
3 tbsp chopped fresh dill
3 tbsp finely chopped fresh parsley
230g cooked salmon, torn into small pieces
pinch of grated nutmeg
salt and freshly ground pepper
60g butter
6 sheets of phyllo

Preheat the oven to 180℃.

Put the spinach in a pan and cook for 1-2 minutes, until wilted. Take the pan off the heat and squeeze out all the liquid. Finally chop the spinach and set aside.

Melt the butter in a pan, add the onions and garlic and sauté for 2 minutes on medium heat, stirring often, until slightly softened but not browned. Set aside.

In a medium bowl, whisk together the eggs and cream. Add the quark, parmesan, spinach, sautéed onions and garlic, herbs, salmon, nutmeg and gently stir to combine. Season with salt a pepper.

Melt the butter in a saucepan. Lay one sheet of phyllo on a working surface and brush with the melted butter. Place another sheet of phyllo on top of the first sheet, brush with the melted butter. Repeat process until all phyllo sheets are used. Transfer the phyllo into a buttered pie dish and trim the edges to fit the pie dish.

Pour in the filling and bake until the filling is set and the pastry is golden brown, about 35-40 minutes. Cool 10 minutes before slicing.


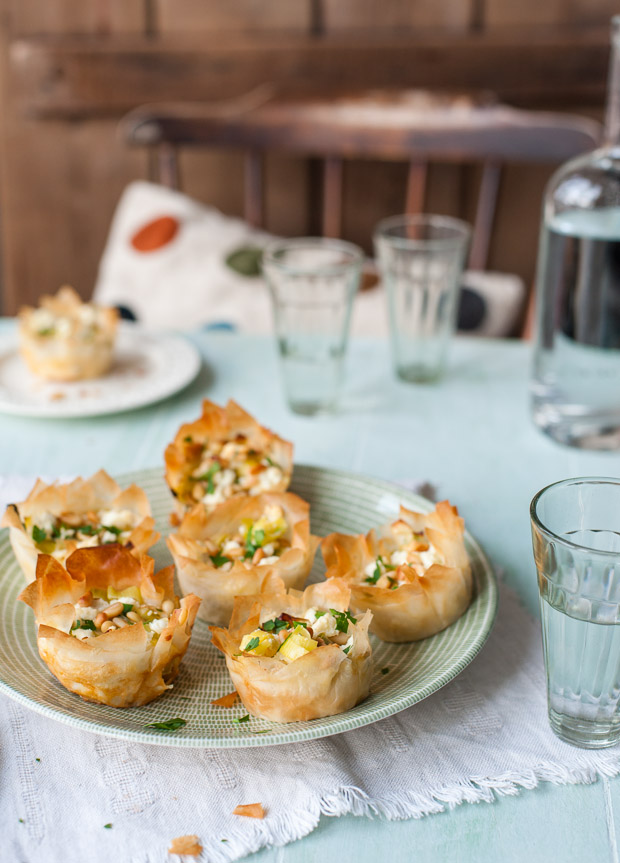
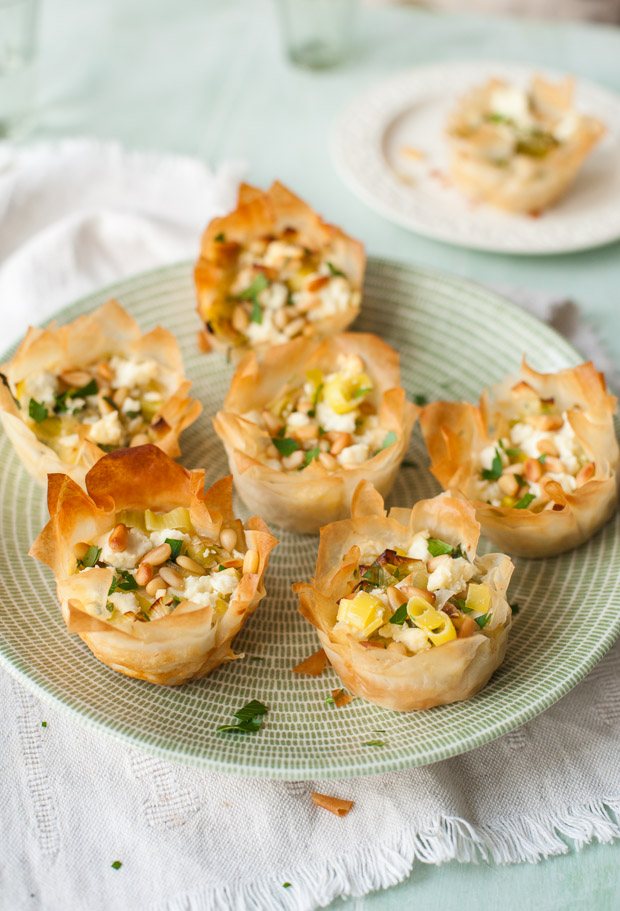
Leek and Feta Filo Tartlets

Leek tartlets

I've been absent on this blog for what seems like ages. I was hoping to get back to blogging after the busy summer. I'm not even trying to talk about things like regular blogging, because let's be honest, my blogging frequency is not very high and it's certainly rather irregular. However my work schedule didn't allow me to spend time working on my personal projects. Or maybe it's just an excuse.

Anyway, I have a very good reason to be back today. I'm very excited to participate in a little surprise baby shower for Emiko who is expecting a baby girl soon!


I met Emiko in person last year at FBC, shortly before she moved from Italy to Australia. She is such a sweet person and I wish we could be with her celebrating this exciting time of her life. Although the distance makes is quite complicated to get together, no distance can stop food blogger friends from sharing their love through food and blogs. Since we all live in different places, we decided to organise a virtual baby shower. Together we have created a baby shower menu to celebrate Emiko's soon-to-arrive bundle of joy.

These mini tartlets are for you Emiko, I hope you would like them. I wish you and your husband joy and happiness in your life with your precious baby girl!

Sarka Babicka

Here is the final menu for the virtual baby shower:

Giulia: Birthday sponge cake
Regula: Cobnut brandy
Jasmine: Cookies
Zita: Vegan pumpkin chocolate cookies
Karin: Flourless chocolate cake with pears - La Belle Helene
Rosella: Soft cheesecake
Valeria: Gingerbread banana muffins

_ _ _ _ _ _ _ _ _ _ _ _ _ _ _ _ _ _ _ _ _ _ _ _ _ _ _ _ _ _ _ _ _ _ _ _ _ _ _ _ _ _ _ _ _ _ _ _ _ _ _ _ _ _

Leek and feta filo tartlets
Makes 12 tartlets

Filling:
30g butter
2 leeks, trimmed and sliced
2 garlic cloves, finely chopped
2 tbsp, chopped parsley leaves
1/4 tsp grated nutmeg
2 large eggs
300ml creme fraiche
salt and freshly ground pepper

Filo cases:
40g butter
4 filo pastry sheets 30x35cm
85g feta cheese, crumbled
2tbsp toasted pine nuts

Melt the butter in pan add the leeks and garlic and sweat gently, stirring often, for 5 minutes until soft. Remove from the heat, stir in the parsley and nutmeg. Set aside.

Preheat oven to 180℃.

Melt the butter in a small saucepan. Lay one sheet of filo pastry on a flat surface, brush lightly with the melted butter and cut into 9 squares (10x10cm). Lay three squares of pastry on top of each other, turning each square so they don't line up and create a star shape.  Press into a buttered muffin tin. Repeat with another sheet of filo pastry to make 12 cases.

In a bowl, beat the eggs with creme fraiche, season with salt and pepper. Divide the egg mixture among the cases. Spoon the leeks on top and scatter with crumbled feta cheese and pine nuts. Bake for 15 - 20 minutes until the filling is set and the filo pastry is lightly golden.

Let cool slightly, remove from the muffin tin and serve.

_ _ _ _ _ _ _ _ _ _ _ _ _ _ _ _ _ _ _ _ _ _ _ _ _ _ _ _ _ _ _ _ _ _ _ _ _ _ _ _ _ _ _ _ _ _ _ _ _ _ _ _ _ _


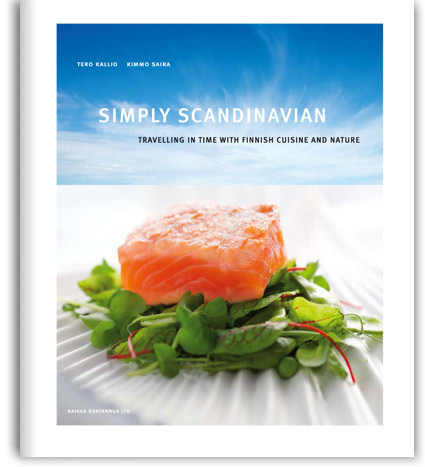
Simply Scandinavian and Rye Canneloni


I tend to gravitate towards anything that is at least a bit Scandinavian related. I have a special relationship with many Scandinavian countries. Norway is my mum's birth place, Sweden became my grandparents home for five years, and our very dear friends are Finnish. It comes as no surprise, then, that I was very excited when I got my hands on a Finnish cookbook a couple of weeks ago.


A cookbook review is something completely new for me and for my blog, but I could not resist to introduce you Simply Scandinavian, Travelling in Time With Finnish Cuisine and Nature. It has everything a good cookbook should have - delicious recipes and gorgeous food photos, plus a bonus - breathtaking photos of Finnish nature in different seasons. Four main parts of the book corresponding to four seasons will guide you through spring, summer, autumn and winter in Finland. Each chapter introduces traditional appetiser, main course and dessert recipes using seasonal ingredients. The importance of using local and seasonal ingredients is definitely one of many things I love about Finland.

As I was leafing through the book, lovely memories from our visits to Finland were coming back, and I was contemplating what recipe I should try first. I noticed some of the ingredients like black bread from Åland, bark flour, reindeer or moose meat may be difficult to find here, however I marked many recipes I'm definitely going to try.


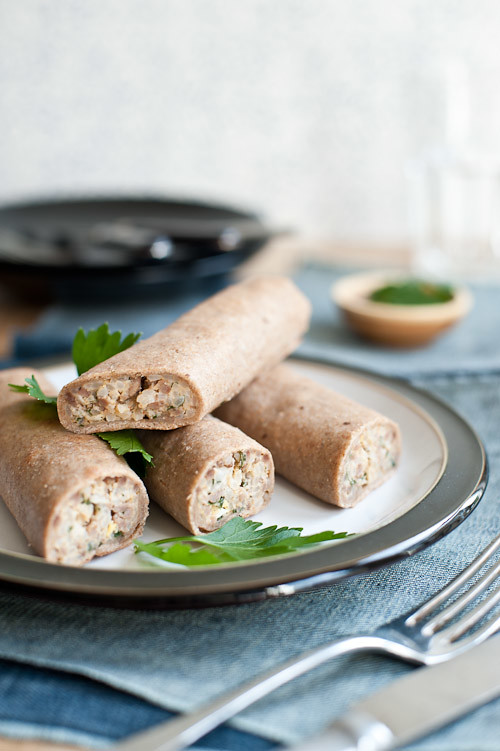
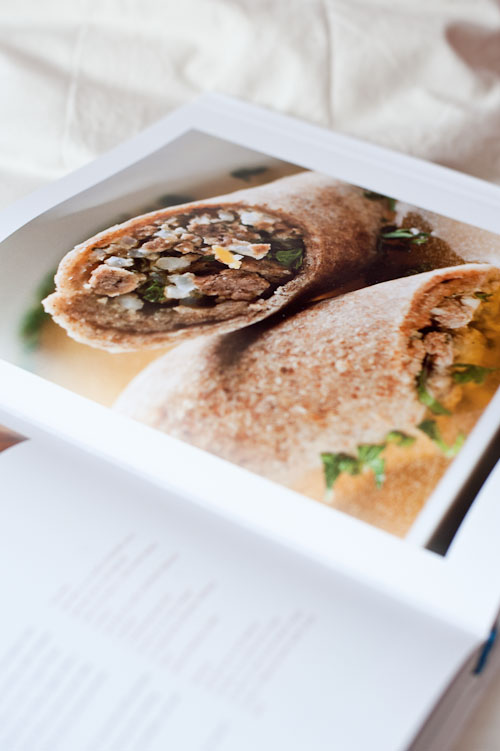
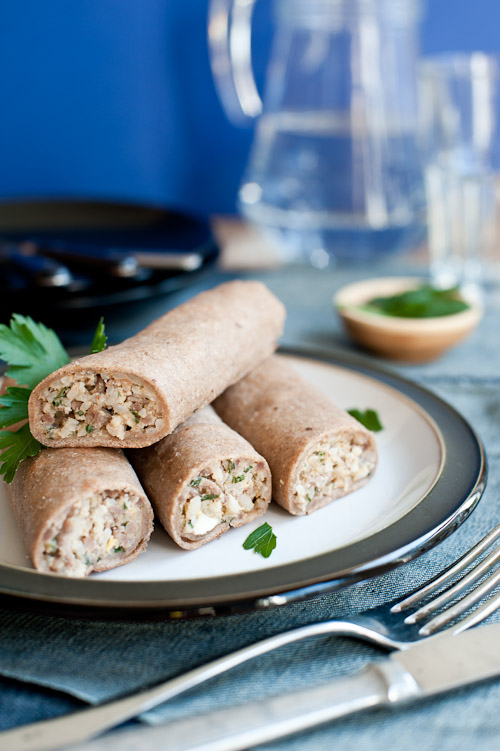
I finally made my choice and picked rye canneloni recipe, because it resembles my favourite Karelian pies. I followed the recipe instructions exactly and it was easy to make recipe for me however, beginners might find the instructions incomplete as it doesn't specify some details like how long should you cook the eggs or fry the meat. Also the list of ingredients doesn't contain milk and butter for brushing the canneloni after baking. As the recipe suggested, I replaced the bark flour with rye flour, and I didn't serve the canneloni with consomme but enjoyed them on their own instead, and the result was great.

As a passionate food photographer I should point out that some of the food pictures in the book would benefit from a wider setting as close ups with shallow depth of field are not always the best way to show the food from its best side. However, my overall impression is that this visually beautiful cookbook is a perfect guide to Finnish food and nature.


Rye Canneloni, Consommé
(Tero Kallio, Kimmo Saira. Simply Scandinavian. Raikas publishing Ltd. 2. edition, 20009)

Filling:
300 ml (1 1/4 cups) pudding rice
600 ml (20 fl oz) water
500 g (18 oz/1.1 lb) steak mince
3 eggs
100 ml (2/5 cup) chopped parsley
1 onion
1 teaspoon butter
50 ml (1.7 fl oz) cream
1/2 teaspoon ground paprika
salt
black pepper corns

Dough:
200 ml (6.8 fl oz) water
350 ml (1 1/2 cups) rye flour
100 ml (2/5 cup) plain wheat flour
50 ml (3 tablespoons) bark flour
salt

Pour the water into a saucepan and boil the rice for approximately 20 minutes. Drain the water from the rice. Chop the onion and fry it lightly in butter in a frying pan for approximately 5 minutes. Fry the steak mince. Hard-boil two eggs. Chop the eggs and mix all ingredients. Add one raw egg and the spices. Mix well. Taste for flavour.

Stir the different kinds of flour and salt into the lukewarm water. Knead the dough for a few minutes. Leave to rest for a while. Roll out the dough into a 2-3 mm (0.1 inch) thick layer and cut into about 12 x 20 cm (5 x 8 inch) pieces. Place two heaped tablespoonfuls of filling along the longer side of the piece of dough. Wet the edges of the dough and roll the cannelloni into a cylinder shape. Brush the surface with melted butter. Bake in the oven in 250C (480F) for 10-15 minutes. Brush the surface again with a mixture of butter and milk as soon as you take the cannelloni out of the oven to prevent them from going dry.

Serve with consomme seasoned with parsley.

Tip: bark flour is not necessary for making these delicious cannelloni. If not available, use rye flour instead.


Chocolate brioche and Monthly Mingle


Last week I announced my first participation in a blogger event. I joined Coulinary Tour 2010. During the virtual foodie visit in Brazil I found my new sweet passion - Dulce de Leche. You can still join the tour if you are interested and explore new culinary worlds. I've truly enjoyed the event and decided to go on.

I might have already confessed that I have a sweet tooth. My sweet tooth and the fact that I constantly try to improve my bread-making skills inspired me to join another blogger event. This time I chose Monthly Mingle hosted by Jamie from the lovely blog Life's a feast. The theme for this month is Bread & Chocolate. I just could not resist!


To be honest, it took me a while to decide what was I going to bake. Bread and chocolate? I did not want to think about a classical bread. I just didn't like the idea of sweet chocolate bread. But what else can be counted as bread? I found many chocolate bread recipes. I wasn't intrigued by any of those.
I woke up on Saturday morning with a sudden flash of inspiration. Brioche! But... What is brioche? Is it type of bread? I have never tasted it. Again! There are so many goodies I still don't know! I love foodie world. Sometime it is kind of frustrating though. I feel like a kid in the grown-up world. A friend of mine talked about brioche a couple of weeks ago. He said it was delicious. That's all I knew.
Thank you uncle Google. You know everything what I don't know! You helped me again.


Wikipedia. Another favourite site of mine!

"Brioche is a highly enriched French bread, whose high egg and butter content give it what is seen as a rich and tender crumb. It has a dark, golden, and flaky crust from an egg wash applied before and ager proofing."
Source: Wikipedia

Bingo! That's the one I have been looking for. Let's just add some chocolate. Yum!


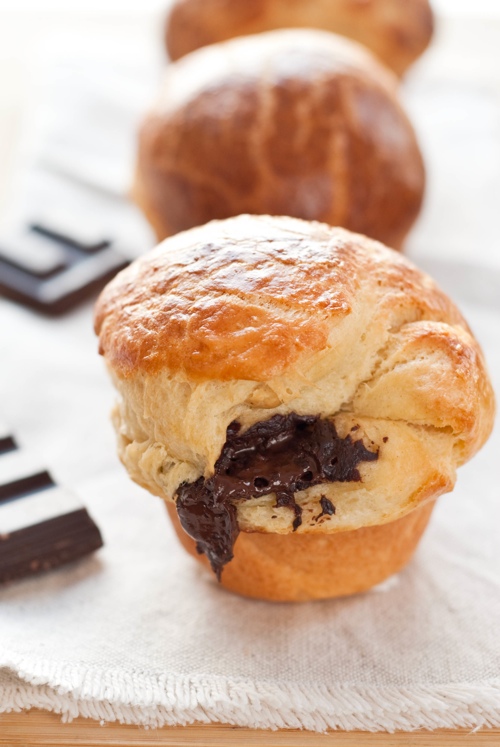
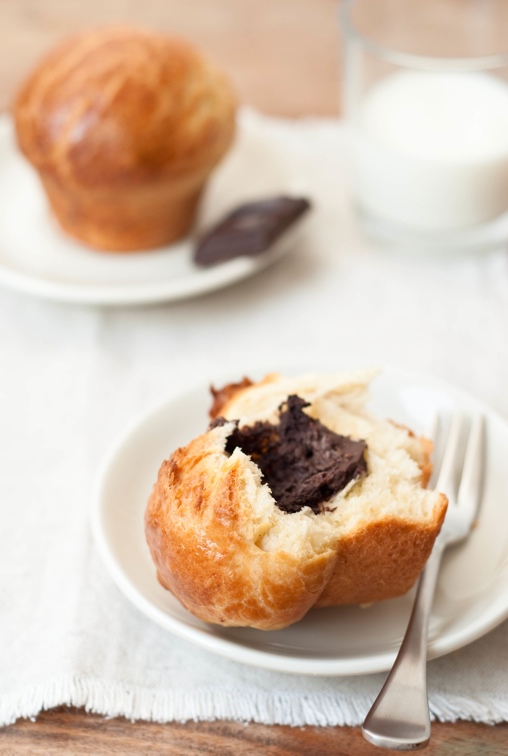
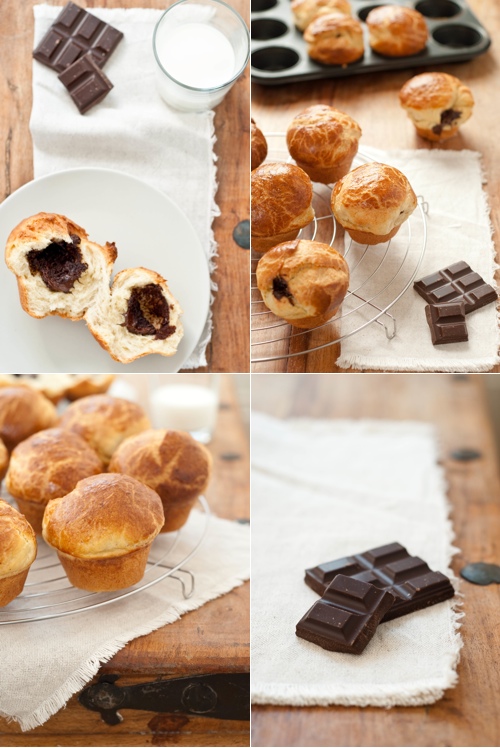
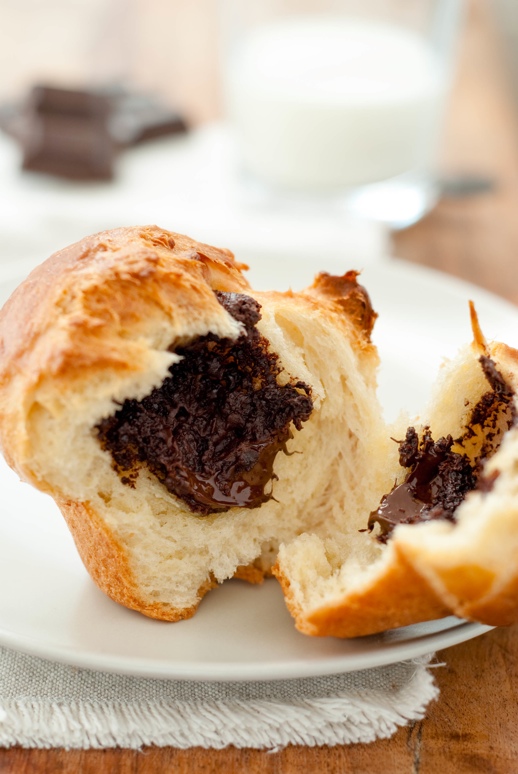
I liked brioche a lot. I will definitely make it again. I just wonder if I can freeze them. We had a hard time eating 12 rich and buttery brioches. I might also point out that the recipe originally called for kneading dough in a stand mixer. As I don't have one, I had to knead it by hands. I also had to ask P. for help during a phase where recipe said "increase speed to medium-high"! :) Fresh warm brioche with melted chocolate centre was well worth all the effort!


Chocolate Brioche

Ingredients
1/3 cup warm milk
1/3 cup warm water
10 g dry active yeast
450 g plain flour
2 tsp salt
3 large eggs
55 g sugar
300 g butter, cut into small cubes, softened
150g dark chocolate, broken into pieces
1 egg, beaten with 1 tbsp water, for egg wash


1. In a large bowl mix warm water, warm milk, 1 teaspoon of sugar and yeast. Stir until yeast dissolves and let proof for 10 minutes.

2. Add flour and salt and mix with a wooden spoon until flour is moistened. Beat in eggs, adding one egg at a time, making sure each egg is well incorporated before adding another one.

3. Add sugar and keep kneading dough until it comes together. Now comes the tricky part. Mix in butter, adding only one or two cubes at a time, kneading well until each cube is incorporated before adding another cube. This can takes about 10 minutes before all butter is fully incorporated. Dough is fully kneaded when it pulls away form sides of your bowl.

4. Transfer the dough into a clean bowl, cover with a plastic wrap and let it rise at room temperature for 1 hours or until double in size. Lift up dough around edges and allow it to deflate.

5. Refrigerate the dough for 2 hours. Punch the dough down to deflate it every 30 minutes until it stops rising. Cover bowl with a plastic wrap and refrigerate overnight.

6. When you are ready to make brioche, butter a muffin pan or brioche tins you want to use.

7. Take the dough out of the refrigerator and scrape it out on a floured surface. Divide dough into 12 equal pieces. Roll each piece between your palms to form a ball. Flatten each ball of dough and put several pieces of chocolate in the middle of each one. Roll up into a ball shape and place in the pan.

8. Cover the pan loosely with a plastic wrap and let rise for two hours at room temperature.

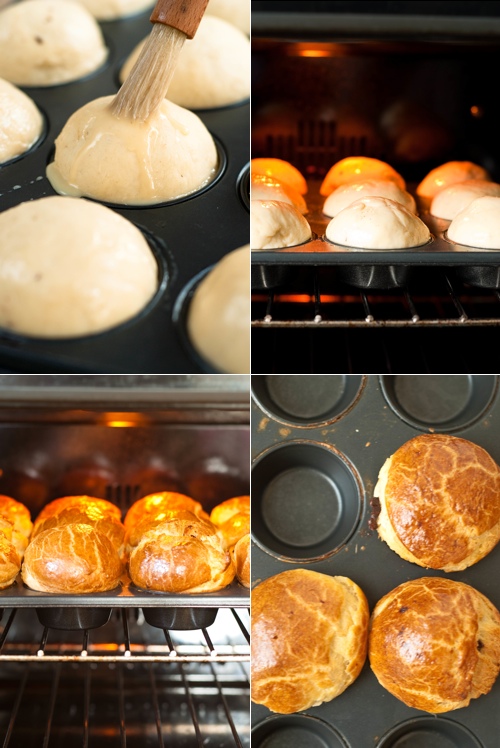
9. Brush each ball with egg wash and bake in the preheated oven to 180C/fan for 20 - 25 minutes until golden brown.

10. Allow brioche to cool for a couple of minutes in the pan and then transfer onto the cooling rack.