30 October, 2009

Quick lunch - Potato and Sweet corn chowder


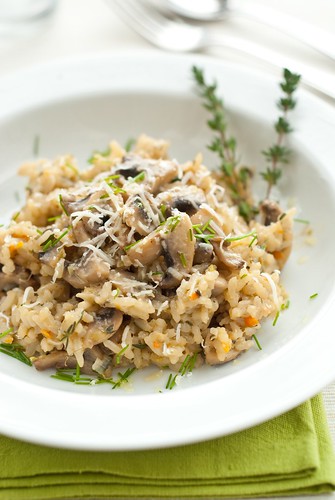
There is no real story behind this soup... You know those days, when you don't feel like doing nothing, though you have to eat something, right? In fact, I was in the mood for a good soup. It is such a nourishing and light food. Just great for a lunch. And, I was planning to make this soup for a while already. However, I could not, because I didn't have a blender. Well, my new Multiquick arrived two weeks ago or so, just in time for yummy autumn soups...! :)


Potato and Sweet corn chowder
Serves 4

Ingredients
340g canned sweet corn
2 tbsp vegetable oil
1 onion, finely chopped
3 garlic cloves, crushed
1 celery stalk, diced
1 carrot, peeled and diced
2 large potatoes, peeled and diced
1 litre (4 cups) vegetable or chicken stock
2 tbsp finely chopped parsley or chive

1 Bring 250ml (1cup) water to the boil and add the sweet corn, cook for 1 minute. Blend half of the sweet corn in a blender and set aside.

2 Heat the oil in a large saucepan, add the onion, garlic, celery and a large pinch of salt and cook for 5 minutes, then add the stock, cooked corn and blended corn mixture. Reduce the heat and simmer for 20 minutes, or unit the vegetable are tender. Season well, and stir in the chopped parsley or chive before serving.

28 October, 2009

Childhood memories and Cranberries Coconut rice pudding


I can't believe I have not had rice pudding for soooooo long! Well, I had a ready made rice pudding couple of times. I mean, the one you can buy in any grocery store, but it does not count. What I am talking about is the yummy, lovely smelling home made rice pudding. Yes, that one which my mum made for my brothers and me. It always took infinitely long to get it cooked, from my point of view. I just could not wait to taste it's marvellous creamy taste. I loved it still warm when the smell of freshly cooked rice was strong, and any fruit on top was slightly melting and releasing it's own aroma. My mum usually served rice pudding with fresh apricots during summer and with home made apricot compote during winter, when no fresh apricot were available.

When I am thinking about it, this was a first rice pudding I have made myself! And the best is, it was extremely easy to do. Yes, it is the kind of quick, easy, and very tasty dessert. I have mixed all leftover I found in a fridge, but the result was extraordinary! :) I guess, you can use just a coconut milk if you prefer more coconut flavour, or just a milk if you don't like coconut. As well, you can omit a double cream for a lighter dessert. I have chosen a cranberry sauce to finish the rice pudding, and I have to say, it was a good choice. I like the slightly sour taste of cranberries contrasting with sweet rice.


Cranberries Coconut rice pudding
Serves 4

Ingredients
1/2 cup rice
140ml double cream
160ml coconut milk
220ml milk
3 cardamon pods
2 tbsp palm sugar (jaggery)
cranberry sauce or cranberry jam (better option)
1 tsp shredded coconut, to serve
1 tbsp unsalted pistachios, chopped, to serve
fresh mint, to serve

1 Wash the rice and drain well.

1 In a small pan mix the double cream, coconut milk and milk with the cardamon pods. Bring the mixture to the boil.

2 Add the rice and stir well. Cover and simmer over very low heat, stirring occasionally, about 15-20 minutes, until the rice is tender and most of the liquid is absorbed. If the rice is too dry, add a little milk and stir.

3 Discard the cardamon and add the palm sugar. Mix well.

4 To serve, pour 1 tsp of cranberry jam into each glass and divide the rice pudding between them. Top with another dollop of cranberry jam and sprinkle with coconut and pistachios. Finish with the fresh mint leaves. Serve warm or cold.

27 October, 2009

My favourite Mushroom and Thyme risotto


I have wanted to make my favourite mushroom and thyme risotto for a long time! I so much like it...! I had planned it several times, but in the meantime I tried new and interesting recipes, and no space left for the risotto. Other things happened, which kept me from making it. Such as when we went to Prague to celebrate our birthday and my thyme, I had been growing for couple months, dried completely because nobody watered it for a week. Poor thyme!

Finally, I made space for the risotto last friday evening. I gave it all the more care, and I can say it was the best risotto I've made, so far. If you don't like mushroom or have another vegetable left, use it. I also like it with spinach or broccoli.


Mushroom and Thyme risotto
Serves 4

Ingredients
olive oil
1 medium onion, peeled and finely chopped
2 sticks of celery, finely chopped
1/2 carrot, grated or finely chopped
2 garlic cloves, finely chopped
400g risotto rice
150ml white wine or vermouth or rum
1.5 litres hot chicken stock
2 tbsp fresh thyme leaves
1/2 tbsp fresh rosemary, chopped
sea salt and freshly ground pepper
400g mushrooms, peeled and roughly chopped
4 spring onions, finely sliced
handful grated parmesan, plus shavings, to serve
fresh chopped parsley or chives, to serve
extra virgin olive oil

1 Prepare or heat the stock in a saucepan and keep it aside.

2 Heat the olive oil in a big nonstick pan and add the onion, celery, carrot and garlic. Fry the vegetable slowly for about 10 minutes until softened and slightly coloured. Turn the heat up and add the rice, then stir well. The rice will become translucent. Pour in the chosen alcohol, keep stirring until the liquid has cooked into the rice.

3 Now add the first ladle of hot stock. Turn the heat down and simmer, stirring often. Allow each ladle to be absorbed before adding the next. Add the thyme and rosemary. Carry on adding stock until the rice is soft but with a slight bite left in it. This should take about 30 minutes.

4 Meanwhile, heat two spoons of olive oil in a pan. Add the spring onion a fry slowly for 1 minute. Stir in the mushrooms and fry until the mushrooms are soft. Season well.

5 Take the risotto off the heat. Stir in the parmesan and the mushroom, check the seasoning. Put a lid on a pan and leave the risotto to relax for about 5 minutes. This is the time when the risotto become beautifully creamy.

6 Serve the risotto topped with the parmesan shavings and fresh parsley or chives. Finish with a drizzle of extra virgin olive oil.

23 October, 2009

Mini apple and wendsleydale pies

Ok, it's true. Autumn is here! Summer flew away with all it's amazing, yummy fruit. But don't worry! Autumn brings new fruit and veg and more importantly, new recipes! So let's cook :-)

For a Mini apple and wendsleydale pies recipe, check the official Cooking the Wheel site.

Cooking the Wheel - let's celebrate English seasonal festivals

Each country has it's specific festival dishes. You love them because you usually eat them only once a year. That is why I like a christmas potato salad so much. There is so many such dishes in Czech Republic, but it is not what I want to tell you about today. Do you know any English festival dishes? I confess, until recently, when you said English food I imagined fish&chips and a christmas pudding. This was true before I met Angelique Talbot, a passionate food lover who decided to cook and eat her way round the wheel of the year. Read more about the Cooking the Wheel project here.

Angelique with her project was a real blessing and it has been an honour for me to become the project's official food photographer and stylist!

Me & Fish & chips in Brighton :)

22 October, 2009

Food Photography - my passion


I haven't been the most diligent blogger in recent days, because I try hard to improve my food photography skills so I can bring you more quality pictures of my cooking and baking experiments. Actually, I think I haven't told you about my food photography passion yet.

Everything began so unexpectedly and surprisingly. I guess this blog is what made me so curious and gradually absolutely enthusiastic about food photography. I've always loved food and I've always been passionate about baking since about my 15 , though I didn't cook very well, and I actually wasn't really interested in cooking at all. Yeah, it could be because I was apparently lucky enough having very good cooks around all the time... Hence it was a huge surprise not only for me but for everybody around when I started cooking like a maniac!! ;-) It still makes me smile when people constantly ask me "Do you really cook?". Anyway, I love it! And I can't believe it myself!

Let's give it an order and let's start with the beginning, shall we?


This blog.
Well, I know it's a bit weird I'm telling you why I started this blog after having published several posts already, but still... I started cooking! ;-) I was so pleased with myself and I had a burning need to tell someone about it. It was such a great feeling after publishing my first post (even though apparently nobody read it). Since then, I've been milling around shelves in supermarkets and local markets looking for new scrumptious and interesting products and ingredients as well as searching an internet and cookbooks for hours looking for new recipes. Surprisingly my boyfriend is very happy about my new obsession :-)


My second new obsession is food photography and food styling. Those came hand in hand with the cooking. I love (and always did) beautiful food photos. It is said that we eat with our eyes first, and I can only agree. I love the feeling when gorgeously styled food lands in front of me on the table. I might only eat with my eyes sometimes. That's why I like cookbooks full of beautiful pictures which help me to get an idea of what will I cook. Food must look appetising to draw my attention.

But let's get back to the point. As I started my blog I wanted to show you what I cooked or baked, then I asked my boyfriend to make photos for me, as photography had been his hobby since I've known him. Well, it has worked, though, not for a long time. I had to start trying myself. It may sound like a cliche, but I woke up one morning and I loved it! I wanted to know everything about photography and how to make a beautiful food picture. To be honest, until then I hadn't showed much interest in my boyfriend's DSLR, despite his many attempts to teach me how to use it. Instead, I got my own "point and shoot" tiny compact camera, which now "rests in piece" in a drawer.

I get lots of inspiration on Flickr where so many talented people publish their pictures. Their comments on my photos are a real help and a support, and I would like extend my thanks to all of them! Another great source of inspiration are food blogs. You can see some of my favourite in a right sidebar - "My favourite sites&blogs".

13 October, 2009

Cheesy leek and spinach pasta

I have to confess, I'm a pasta maniac! I just love all kinds of pasta and I can eat it anytime. There are so many great things about pasta... like it's so easy to make, extremely versatile, you can eat pasta cold or hot, it's delicious both sweet and savoury and much more. I know, since low carb diet has become so popular, pasta is no more on menu of many people, even so I still like it.


Beside this, another thing I love, and apparently more diet friendly, is spinach. For me, pasta and spinach is an unbeatable combination. My all time favourite is spinach and garlic creamy pasta with chicken. This time, though, I wanted something else. I was searching the web for a while and end up with a recipe from BBC Good Food. Unexpectedly I had most of ingredients needed for the recipe, which led to only minor recipe modifications. I really liked the combination of leek and spinach in this recipe which blended well with dried tomatoes. It's very important to use the given amount of the blue cheese to give the pasta a distinctive taste.


Cheesy leek and spinach pasta
Serves 4

Ingredients:
knob of butter
1 tbsp olive oil
2 large leeks (about 450g) thinly sliced
500g pasta (penne or other favourite shape)
100g Philadelphia
100ml double cream
1 tbsp wholegrain mustard
125g Saint Agur or other blue cheese, diced
8 sundried tomatoes in oil, thinly sliced
225g baby spinach leaves (roughly cut if leaves are too big)

1 Melt the butter with the oil in a large pan, add the leeks and splash in a little hot water. Cover and cook over a low heat, stirring occasionally, for about 10 minutes until no longer squeaky.

2 Meanwhile start boiling salter water for the pasta and cook according to the packet instruction.

3 Combine Philadelphia with double cream and tip it with the mustard into the leeks, add three quarters of the cheese and season well. Stir well until the cheese melts. Take off the heat.

4 Drain the pasta, reserving the cooking water. Tip the pasta into the sauce and stir. Add enough cooking water to make the sauce coat the pasta. Stir in the spinach, a big handful at a time, until it wilts, splashing in a little more water if needed. Add the tomatoes, sprinkle with the remaining cheese and serve.

06 October, 2009

My first photo remake of Double crusted Plum Pie


I have to tell you about this because I'm so excited... I've made a first Pie in my live! You probably think what's so exciting about making a pie? Well, there's actually nothing really exciting about a pie though there's something exciting about MY first pie. First the reason why I made this pie is not because I really wanted to make my first pie but the reason is I needed to take a photo for my first SLW Photo Remake. And finally, I'm so excited because I think I did pretty well...! This pie is really scrumptious and the photo is not bad either (at least in my opinion, I will see what others will say). I hope it's more clear now :)


It wasn't easy at all to make this pie just for the fact that:
  • I've never made one in my live
  • I didn't have a pie plate
  • I couldn't find any "yummy" looking recipe
But I managed to solve all these difficult bits a pieces and it was really fun in the end. I had to buy a new pie plate first (later on I realised I didn't actually buy a pie plate but a tart plate) and I spent about an hour searching for a recipe. I discovered two recipes and decided to combine both as I wanted to make a plum pie. The original recipe I used for the dough is here.

Well I finally collected all my strength to make the pie at about 9pm, not to mention I didn't have a plain flour and a corn starch. I'm so lucky a local shop is no more than 2 minutes walk away from our flat and is open till 11pm! Ok, everything else went really smoothly until the moment when the plum filling tried to escape from a pie plate and messed the whole oven. Think positive - I wanted to clean the oven anyway. Ugh, I love making pie. Today lesson - always make sure you are prepared!


Double crusted Plum Pie
Serves 8

For the crust:
2 1/2 cups all purpose flour
1 tbsp sugar
1 tsp salt
2 sticks (1 cup/227g) chilled unsalted butter, cut into small chunks
6 tbsp ice water

1egg mixed with 1 tbsp water, for egg wash (I used milk instead)
granulated sugar to sprinkle on the top

For the filling:
900-1000g plums
1 cup sugar (plums I had were quite sour but I think less sugar could be used if fruit is sweet enough)
1/4 cup cornstarch
1/4 tsp salt
2 tbsp vanilla extract
2 tbsp milk

The dough may be done in a food processor but I don't have one so I used my hands. Whisk together flour, sugar and salt in a large bowl. Rub in butter with your fingertips until you get a coarse mixture. Add the water and blend until the dough almost comes together into a ball. You can add a little more water if it looks a little dry. Divide dough in half then shape each half into a ball. Wrap each in plastic wrap, and refrigerate them for at least 1 hour.

Preheat oven to 190C/375F.

Wash plums, cut them in half, removing the stones. Cut about half of the plums into quarters and half into sixths. Combine cut plums, sugar, salt, cornstarch and vanilla extract in a bowl and set aside.
Lightly grease your pie plate. Roll out one ball of the dough on a lightly floured surface to make a bottom pie crust. Make sure there will be a bit of overhang around the edge of the pie plate. Fill the bottom crust with plum mixture. Make a top pie crust by rolling out second ball of dough and lay on top of the pie plate. Seal filling in completely by pressing down the top crust edges. Brush the top of the crust with egg wash and sprinkle generously with sugar. Using a small sharp knife, cut 5-7 slits in the top crust.
Bake for 65-75 minutes, until crust is golden brown and the filling is bubbling through vents on the top of the pie. Let pie cool completely on a wire rack before slicing to ensure that the filling thickens up.