Pistachio Ice Cream and Photography Creativity


I made pistachio ice cream quite a while ago and waited too long to post the recipe. It has been in the freezer for a month or so and I wasn't able to take a decent photo to show you how delicious it is. I only have one photo. Yes, only ONE! I can't believe it myself. What is wrong with me? I have been lacking inspiration and creativity. I haven't made a nice photograph in a while. I can't! It's very frustrating! I love photography and I do love food photography. But I'm stuck, and it doesn't help to just hit the shutter button and wait for a miracle.

It takes a lot more to be a photographer and create beautiful photos.

"You don't take a photograph, you make it." - Ansel Adams

I'm not a photographer, or at least I can't call myself a professional photographer. I'm just a passionate amateur. Taking photographs makes me happy and that's what is important. However, I have to take a break from food photography. I need to recharge my inner photography battery, and then I will come back and make beautiful photos again. Well, I hope I will.

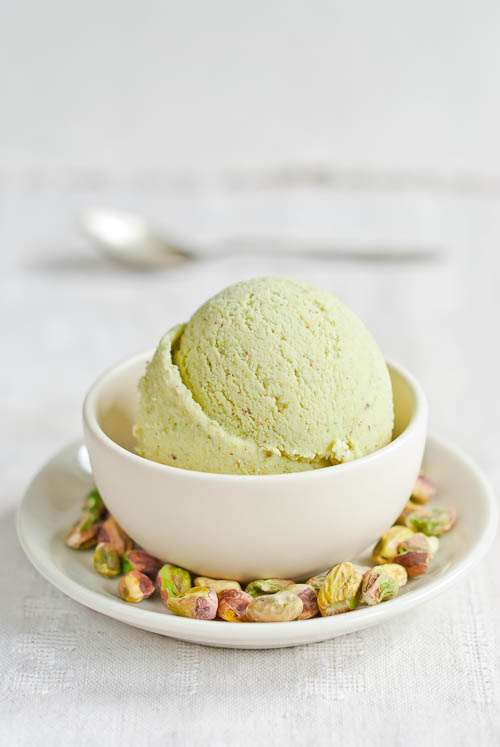
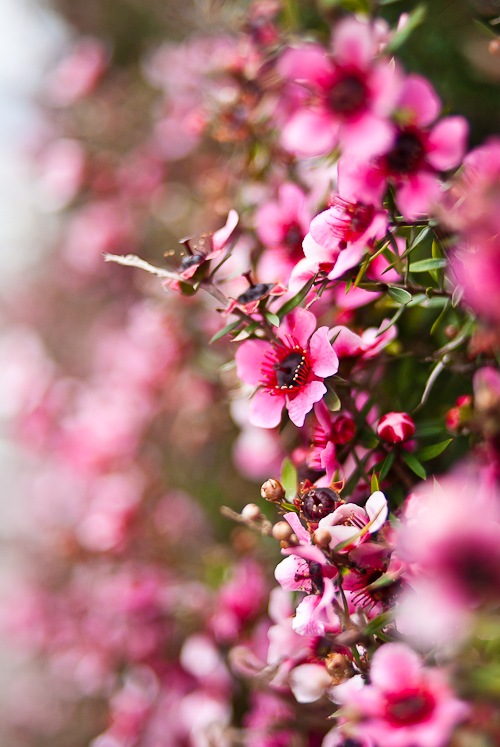
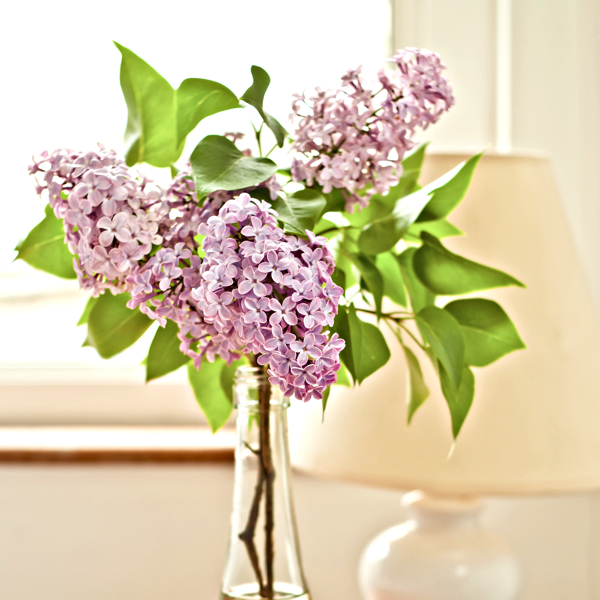
So please bear with me. Today I won't share my favourite photos with you, I don't have any favourites except this one, my first macro photo. I like its colours.


At least I can share this yummy pistachio ice cream recipe. Pistachio has been my favourite ice cream flavour since I was a kid. There's one really good thing about ice cream, it makes me happy whenever I eat it! :)


Pistachio ice cream

250g pistachios
280g demerara sugar
1l milk
500g creme fraiche

1. Pour the milk into a saucepan and add the sugar. Bring to a boil over a medium heat. Remove from the heat and let cool completely.

2. Meanwhile, ground the pistachios in a food processor or blender. Whisk together the pistachios, creme fraiche and milk until well combined.

3. Freeze in your ice cream maker according to the manufacturer's instructions. If you don't have an ice cream maker follow these instructions. Pour your ice cream mixture into a freezer safe container and place it in the freezer. As the mixture starts to freeze around the edges, remove it from the freezer and stir well. Try to break up any frozen sections. Return to freezer. Repeat the process until the mixture is smooth and frozen. I often use a hand blender to break up all frozen crystals.


Rhubarb and Apple Crumble


I couldn't wait to share this recipe with you. I know, you may think it's just another rhubarb crumble recipe. If you look around the food blogosphere, you will probably find hundreds of rhubarb recipes at the moment, rhubarb crumble recipes in particular. It seems that rhubarb is in season all around the world. However, I think there are never enough rhubarb recipes! So I hope you won't mind when I add one more.


I have always loved rhubarb, but not as much as my older brother. I think my mum's rhubarb crumb cake was his most favourite dessert ever. Luckily for him, our grandparents used to grow rhubarb in their garden and supplied us with lots of rhubarb most of the summer. It seemed to me that rhubarb was more like a weed, it was harder to kill than grow. So my grandparents had lots and lots of it! What would I give for their rhubarb now! Sigh!


I prefer desserts with more fruit and less pastry or dough, and so does P. Then it comes as no surprise that our favourite dessert is crumble. I might actually say that crumble was partially responsible for the birth of this blog, which creates a special relationship between crumble and me. Just check my first blog post, where I posted a recipe for apple crumble, followed by a strawberry crumble recipe less than a week later. Three crumble recipes aren't too many for one blog, are they? But believe me, this one was the best crumble I have made so far, or at least I thought so while I munched on still warm, freshly baked crunchy crumble.


Rhubarb and apple crumble

fruit filling:
8-9 stalks rhubarb, cut into 2cm pieces
2 apples, cored and diced
3cm piece fresh ginger, peeled and grated
2 tbsp rum
1 tbsp cornstarch
65g light brown sugar

crumble:
85g wholemeal plain flour
65g light brown sugar
50g rolled oats
75g unsalted butter, softened
l/2 tsp salt
pinch freshly ground black pepper
1/4 cup flaked almods

1. Preheat the oven to 180C and butter a gratin dish.
2. In a medium bowl mix the flour, oats, sugar, salt, black pepper and almonds. Add the butter and rub in with your fingertips until the mixture resembles breadcrumbs. Gather the mixture into a ball and place in the freezer for about 10 minutes.
3. Mix together sugar and cornstarch in a large bowl, add the apples, rhubarb and ginger, and toss until evenly coated. Pour in the rum and toss again.
4. Place the fruit mixture in the prepared gratin dish and sprinkle the crumble filling over the top.
5. Bake for 30-40 minutes, or until the crumble mixture is golden brown and the fruit filling is bubbling.
6. Let it cool down for at least 15 minutes before serving.


Sprouting Broccoli, Kale and Cauliflower tart


I should apologise to you my readers. I know you must be tired of reading about weather. I don't want to mention London weather in every post, but local weather is truly crazy! Do you remember the beautiful blue sky in one of the pictures from a last week's post? I think it was the hottest day of this year. Unfortunately, that is no longer true. This week, we were thinking about turning the heating on again!

I will keep this post short because my hands and fingers are numb (we didn't turn the heating on) and I have probably pinched a nerve in my back which makes sitting at the computer quite painful.


I really enjoyed a Sunday photo walk in spite of the horrible weather. P. has bought an old fashioned film camera and we set out to give it a first try. I'm quite curious how the photos will turn out. Cold and dreary weather was, however quite pleasing in the end, because it produced lovely soft lighting, offering good photography conditions. I went with my digital camera so I can share some pictures with you instead of long writing.


But let's get back to the tart. I really like savoury tarts. Not only they are quite easy to make, but I also love their endless versatility. I usually use ready-made puff pastry (like in this recipe), because it makes the process even easier. However, I wanted to push myself a bit further this time.
Then I found Aran's recipe for a savoury tart, and decision was made. The addition of thyme and rosemary in the pastry sounded very promising. I slightly altered the recipe and ended up with a gluten-free version because I ran out of plain flour and was too lazy to bother getting dressed and go shopping. And only flour I had at home was gluten and wheat free plain white flour blend. I already mentioned this flour in my gluten-free cookies post.

You will have some leftover dough scraps from the tart. Use them to make crackers. They go wonderfully with a soup. I left the dough in the fridge for two days and the cracker turned out perfectly. I made two batches and I left the second batch too long in the oven, so they were a bit darker. They tasted great with a homemade roasted tomato soup, though.


Sprouting broccoli, kale and cauliflower tart

400g gluten and wheat free plain white flour blend
1 1/2 tsp salt
2 tsp fresh thyme
1 tsp dried rosemary
1/2 tsp freshly ground black pepper
200g butter, cut into cubes and chilled
8tbsp cold water

2 tbsp olive oil
1 large yellow onion, halved and sliced
1/2 head of cauliflower, broken into small pieces
5 stems purple sprouting broccoli, stems removed and chopped
2 cups chopped kale
1tsp freshly ground black pepper
1tsp salt
1/2 cup double cream
1 cup milk
3 eggs
200g cheddar cheese, grated


1. In a large bowl combine flour, salt, thyme, rosemary and black pepper. Using a fork mash the butter into the flour until crumbly.

2. Stir in the cold water and bring the pastry together into a ball. Shape the dough into a flat square, wrap it in plastic wrap and place in refrigerator for 2 hours.

3. Turn out the dough onto a piece of plastic wrap and roll to about 0.4cm thick. Lift still on the wrap and place in a tart pan. Press sides gently in and remove any dough that hangs over the edge of the tart pan. With the plastic wrap still on chill it for another 1 hour.

4. Use the scraps to make crackers. Press all of the dough scraps together gently, do not overwork them with kneading. If you want to make crackers right away, roll the dough to 0.5-0.7cm thick and cut squares. Place them on a lined baking sheet and refrigerate for 30 minutes. Before baking sprinkle the crackers with freshly grated black pepper, coarse grained salt or some cheese. Bake for 12-15 minutes at 180C.

5. In a pan heat the olive oil and saute the onion for 5 minutes. Add the kale, broccoli and cauliflower and saute for another 5 minutes. Let it cool a bit. In the meantime, whisk the eggs, milk, double cream, thyme, salt and pepper in a bowl.

6. Take the tart pan out of the fridge and spread the vegetable over the crust. Sprinkle with the grated cheese and pour the egg mixture on top.

7. Bake at 200C for 15 minutes. Reduce oven temperature to 180C and bake for another 20-25 minutes or until the top is golden.


Ginger and Pear Muffins


Do you sometimes feel like you are desperately looking for inspiration, but inspiration doesn't come? I feel very distracted after spending two amazing weeks with our friends and can't get back on track. I often feel the same way after a holiday.

I need to get myself sorted, fast! So please sun, keep shining! It's the beginning of May and the weather changes every day. Sun, rain, sun, rain... I know I live in London. However, can we make a deal? What about sun, sun, rain, sun, sun, rain...? It would be much better! Ok, I should stop complaining.


Well, I have some good news. I don't know if you noticed anything different here. It's not really obvious. So, here's what's new.

Cooking Your Dream got its own domain! Yay! I'm so excited. Actually, P. made me do it. I didn't consider it so important to get my own domain. However, I must confess I felt very excited when I typed cookingyourdream.com in the browser's address bar, hit go and the browser showed me my blog! Sometimes even small things make you happy.

Lost comments are less joyful part of this story. I moved to the new domain on Saturday and none of my comments have come back yet. I still wait and hope.


I know that the sun, flowers, baking, good music, taking photos and my beloved ones always make me happy. You can imagine I was in a ridiculously good mood when we finally managed to visit a local farmers' market on Saturday. I forgot about lost comments and just enjoyed a beautiful day, almost summer-like day. The farmers market was fantastic. I bought some vegetable, olives and rhubarb, P. ate two burgers and then we tasted organic wine. Our curiosity didn't let us leave without one goose egg.


We had definitely more fun photographing the egg than eating it. We decided to make scrambled eggs, but it tasted very different from chicken eggs. I didn't like it. Luckily I still had a few pear muffins. They tasted fantastic!


Ginger and pear muffins

muffins
165 g plain flour
120 g whole wheat flour
2 tsp baking powder
1/2 tsp salt
1 tbsp grated lemon zest
1-2 tbsp grated fresh ginger
2 large eggs
1tsp vanilla
40g unsalted butter, melted
165g light brown sugar
250ml plain yogurt
3 pears, peeled and diced
1/2 cup plain granola

crumb topping
1 cup plain granola
60g plain flour
100g light brown sugar
pinch of salt
2tbsp sliced almonds
70g chilled unsalted butter

1. Preheat oven to 180C.
2. In a medium bowl combine both flours, baking powder, salt, lemon zest and ginger.
3. In another bowl, whisk together eggs, sugar, vanilla, yogurt and butter. Pour this mixture into the dry ingredients and mix until combined. Gently fold in the pears and granola.
5. Make crumb topping. In a bowl, toss together granola, flour, sugar, salt and almonds. Add the butter and rub between your fingers until it resembles breadcrumbs.
6. Divide the batter evenly among the prepared paper lined muffin pan, filling each cup 3/4 full. Sprinkle with crumb topping.
7. Bake for about 20 minutes, or until a toothpick inserted in the center of a muffin comes out clean.
8. Let the pan cool for 5 minutes before removing muffins. Remove the muffins from the pan and place them on a rack to cool completely.